


Advanced 3D sketching


Lesson details
Learning outcome
I can enhance sketches using tone to show depth and texture.
Key learning points
- Rendering helps to enhance communication of design ideas.
- Rendering can be used to show colour, materials and textures.
Keywords
Render - to add details like shading, texture, and depth to a sketch to make it appear more realistic
Tone - the lightness or darkness of an area, which helps create a sense of dimension in the image
Depth - the illusion of distance or three-dimensional space on a flat surface
Texture - how something feels or looks like it would feel, if touched
Common misconception
Rendering is just adding tone.
Rendering should consider tone and depth but also the texture of the material the product is made out of.
Teacher tip
It would be useful to have different material examples as well as a collection of objects to help when practising the rendering.

Equipment
pencil, rubber, ruler, pencil crayons

Licence

Lesson video
Loading...
Prior knowledge starter quiz
6 Questions
Q1.Objects appear when they are further away.

Q2.What is meant by a perspective drawing?
Q3.When drawing in isometric or perspective, all vertical lines need to be __________.
Q4.What are construction lines?
Q5.What is the first stage of the crating technique when drawing a complex curved shape?
Q6.When a drawing is accurately sized and balanced, with all parts relating correctly to each other it is said to be ...
Assessment exit quiz
6 Questions
Q1.When is rendering carried out?
Q2.What is the light source in a 3D drawing?
Q3.What does adding tone to a sketch achieve?
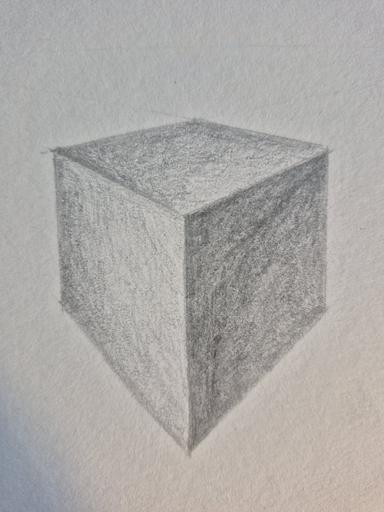
Q4.This sketch has been rendered to show depth. Which direction is the light source coming from?
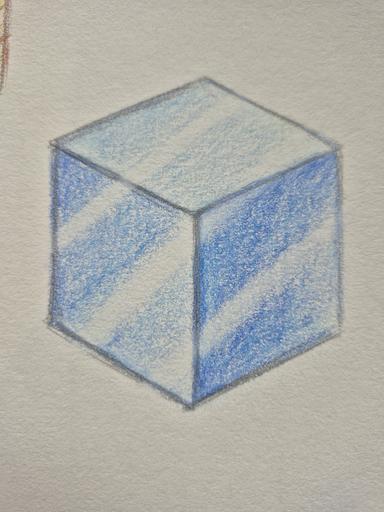
Q5.The sketch below has been rendered to represent which material?
Q6.Put the stages of rendering a cone in the correct order.
To help you plan your 10 design and technology lesson on: Advanced 3D sketching, download all teaching resources for free and adapt to suit your pupils' needs...
To help you plan your 10 design and technology lesson on: Advanced 3D sketching, download all teaching resources for free and adapt to suit your pupils' needs.
The starter quiz will activate and check your pupils' prior knowledge, with versions available both with and without answers in PDF format.
We use learning cycles to break down learning into key concepts or ideas linked to the learning outcome. Each learning cycle features explanations with checks for understanding and practice tasks with feedback. All of this is found in our slide decks, ready for you to download and edit. The practice tasks are also available as printable worksheets and some lessons have additional materials with extra material you might need for teaching the lesson.
The assessment exit quiz will test your pupils' understanding of the key learning points.
Our video is a tool for planning, showing how other teachers might teach the lesson, offering helpful tips, modelled explanations and inspiration for your own delivery in the classroom. Plus, you can set it as homework or revision for pupils and keep their learning on track by sharing an online pupil version of this lesson.
Explore more key stage 4 design and technology lessons from the Product analysis: encouraging healthy lifestyles unit, dive into the full secondary design and technology curriculum, or learn more about lesson planning.